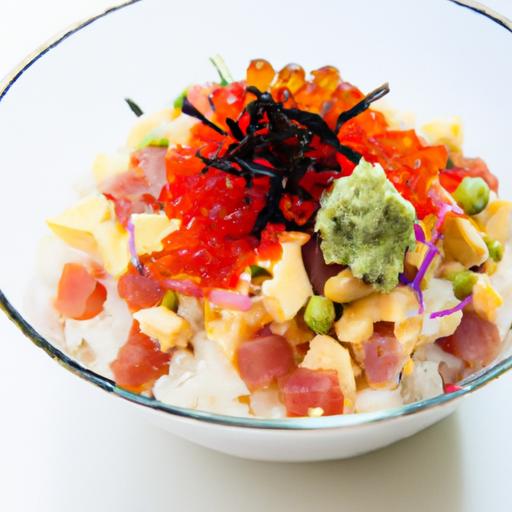
There’s an undeniable magic in the humble yet exquisite sushi rice bowl-a vibrant symphony of textures, colors, and flavors that beckons both the eye and the palate. Whether you’re a seasoned sushi aficionado or a curious newcomer, mastering the art of crafting sushi rice bowls opens a gateway to endless culinary creativity and satisfaction. In this guide, we’ll dive deep into the essentials of perfecting sushi rice, the heart of every bowl, and explore how to layer fresh ingredients that balance taste and tradition. Prepare to savor each bite as we unravel the secrets behind creating sushi rice bowls that are as delightful to make as they are to eat.
Savor the flavor by starting with the foundation of every outstanding sushi rice bowl: meticulously chosen rice.Selecting the right rice variety and mastering the washing and soaking process are essential to achieving that signature texture and mouthwatering taste. When combined with perfectly balanced seasoning and inventive toppings, your sushi rice bowl transforms into an irresistible culinary masterpiece.
Prep and cook Time
- Readiness: 30 minutes (includes washing and soaking time)
- Cooking: 20 minutes
- Total Time: 50 minutes
yield
Serves 4 hearty portions
Difficulty Level
Medium – ideal for cooks ready to refine their rice skills and presentation flair
Ingredients
- 2 cups sushi rice (short-grain Japanese rice,rinsed)
- 2 1/2 cups cold water
- 1/3 cup rice vinegar
- 3 tbsp granulated sugar
- 1 tsp fine sea salt
- assorted fresh toppings and garnishes (avocado slices,cucumber ribbons,pickled ginger,toasted sesame seeds,thinly sliced nori,edamame,or your favourite fish alternative)
Instructions
- rinse the rice: Place the sushi rice in a large bowl. Fill with cold water and gently swish the grains with your fingertips. Carefully drain the cloudy water.Repeat this rinsing 3-4 times until the water runs nearly clear. This step removes excess starch for fluffier grains.
- Soak the rice: after the final rinse, drain well and soak the rice in fresh cold water for 30 minutes. This allows even hydration, ensuring every grain will cook to tender perfection.
- Cook the rice: Drain the soaked rice thoroughly, then transfer to a heavy-bottom pot or rice cooker. Add 2 1/2 cups cold water and cover with a tight-fitting lid. Bring to a gentle boil over medium heat,then reduce to the lowest heat setting. simmer for 18 minutes without lifting the lid.
- Steam and rest: Remove the pot from heat and let the rice rest, covered, for an additional 10 minutes.This resting time lets residual steam finish the cooking and creates that coveted slightly sticky but separate texture.
- Prepare sushi vinegar: In a small saucepan, warm the rice vinegar, sugar, and salt over low heat, stirring until dissolved. Avoid boiling.remove from heat and cool slightly.
- Season the rice: Transfer the cooked rice to a large wooden or glass bowl. Using a rice paddle or spatula, gently fold in the sushi vinegar mixture in cutting motions, fanning the rice simultaneously to cool it quickly and give it that glossy sheen.
- Plate and garnish: Scoop the seasoned sushi rice into bowls, then artistically arrange your chosen toppings atop. Use vibrant colors and diverse textures for visual appeal and flavor contrast.
Tips for Success
- Rice variety matters: Always choose authentic Japanese short-grain sushi rice for that sticky consistency. Medium or long-grain rice won’t yield the ideal texture.
- Don’t rush washing: Proper rinsing prevents gummy clumps and keeps grains distinct.
- Soaking is non-negotiable: A full 30-minute soak helps rice absorb water evenly so it cooks uniformly.
- adjust seasoning to taste: The sushi vinegar balance is key-start with the recommended ratio but feel free to tweak sweetness or saltiness orally before folding it into the rice.
- Use a wooden paddle: A traditional shamoji rice paddle prevents mashing and helps absorb moisture during mixing.
- Cooling matters: The fanning method not only cools but gives sushi rice that lovely, shiny finish.
- Make ahead: Sushi rice is best served within a few hours. If needed, keep it covered at room temperature; refrigeration may alter texture.
serving Suggestions
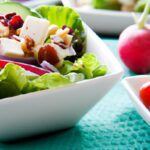
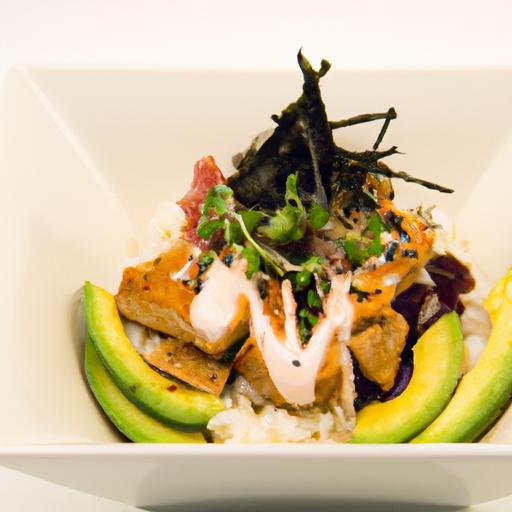
Transform your sushi rice bowl into an artful feast. Try layering felicitously sliced ripe avocado and crisp cucumber ribbons atop your bowl for refreshing crunch. Garnish with a sprinkle of toasted black and white sesame seeds and thin strips of nori for umami depth and subtle crunch. For a pop of acidity and color, adorn with delicately pickled ginger slices. Incorporate a dollop of wasabi or drizzle of soy sauce on the side for extra accents of flavor. Pair the bowl with a crisp cucumber sunomono salad or steamed edamame on the side for a well-rounded meal that dazzles every sense.

| Nutrient | Per serving |
|---|---|
| Calories | 280 |
| Protein | 5g |
| Carbohydrates | 60g |
| Fat | 1g |
For more inspiration on Japanese cuisine and rice techniques,explore our Japanese Rice Cooking Tips article. Also, deepen your knowledge on rice varieties with the authoritative guide at National Geographic’s Rice Varieties Overview.
Q&A
Q&A: Savor the Flavor – A Guide to Crafting Sushi Rice Bowls
Q1: What makes sushi rice the heart of a sushi rice bowl?
A1: Sushi rice, or shari, is much more than just plain rice. It’s a delicate balance of perfectly cooked short-grain rice seasoned with a tangy blend of rice vinegar, sugar, and salt. This combination gives sushi rice its signature sticky yet fluffy texture and a subtle sweet-tangy flavor that harmonizes beautifully with all the bowl’s toppings.
Q2: How do I achieve the ideal texture for sushi rice?
A2: Start with a good-quality short-grain sushi rice and rinse it thoroughly to wash away excess starch. Cook it with a precise water-to-rice ratio, then fluff it gently once done. While still warm, fold in a seasoned vinegar mixture with a spatula using a cutting motion to avoid crushing the grains. Letting the rice cool to room temperature maintains that perfect sticky, glossy texture essential for a sushi rice bowl.
Q3: Can I customize flavors for my sushi rice bowls, or should I stick to traditional seasonings?
A3: Absolutely, creativity is key! While the classic vinegar seasoning is foundational, feel free to experiment by adding a hint of yuzu juice for citrus brightness or a sprinkle of toasted sesame seeds for nuttiness. Just keep the balance subtle, so it complements rather than overpowers the fresh ingredients.Q4: What are some popular proteins and toppings to include in sushi rice bowls?
A4: Think beyond conventional sushi rolls-popular toppings include fresh sashimi-grade salmon or tuna, cooked shrimp, crab meat, or marinated tofu. Add bursts of texture and color with avocado slices, cucumber ribbons, edamame, seaweed salad, and pickled ginger.A sprinkling of furikake or toasted sesame seeds can add a vibrant finishing touch.
Q5: How can I incorporate unique sauces to elevate my sushi rice bowl?
A5: Sauces are your secret weapon to layering flavor. Traditional options like soy sauce, ponzu, or spicy mayo provide a familiar umami boost. For a twist, try blending wasabi with mayo for a creamy kick or a miso-based dressing for a deeply savory note. Drizzle lightly to enhance without drowning the delicate ingredients.
Q6: Is it possible to make sushi rice bowls vegan or vegetarian without losing flavor?
A6: Definitely! Use marinated tofu slices or grilled mushrooms for protein, and load your bowl with colorful veggies like pickled radish, shredded carrots, and sliced avocado. Incorporate seaweed elements and a miso-based dressing to infuse that unmistakable umami punch frequently enough associated with seafood bowls. The key is layering textures and flavors so every bite is captivating and satisfying.
Q7: Any tips for assembling sushi rice bowls like a pro?
A7: Start by creating a well-packed bed of sushi rice at the base. Arrange your toppings thoughtfully-group similar colors or textures together for visual appeal. Don’t overcrowd; leave some rice visible as a canvas for your ingredients. finish with a drizzle of sauce and garnishes like microgreens or sesame seeds. This balance ensures each bite delights both the eyes and the palate.Q8: How should sushi rice bowls be stored if I want to prepare them ahead of time?
A8: Sushi rice bowls are best enjoyed fresh, but if prepping in advance, keep the rice and toppings separate until ready to serve. Store the rice covered at room temperature (no longer than a few hours) to maintain its texture, while proteins and veggies should be refrigerated. Assemble just before eating to preserve freshness and flavor harmony.
Crafting sushi rice bowls is an art of balance-between taste, texture, and visual delight. With the right foundation of perfectly seasoned rice and thoughtfully paired toppings, you’re just a bowl away from sushi bliss!
Final Thoughts
As you gather your ingredients and embark on the artful journey of crafting sushi rice bowls, remember that the magic lies in the balance-each grain of rice, every splash of seasoning, and the vibrant hues of fresh toppings come together to tell a story of tradition and creativity. Whether you’re a seasoned sushi lover or a curious beginner, these bowls offer a delicious canvas to savor flavors both familiar and new. So, roll up your sleeves, trust your palate, and let your sushi rice bowl become a personal masterpiece that delights the senses and honors the timeless essence of Japanese cuisine. Happy crafting-and even happier savoring!