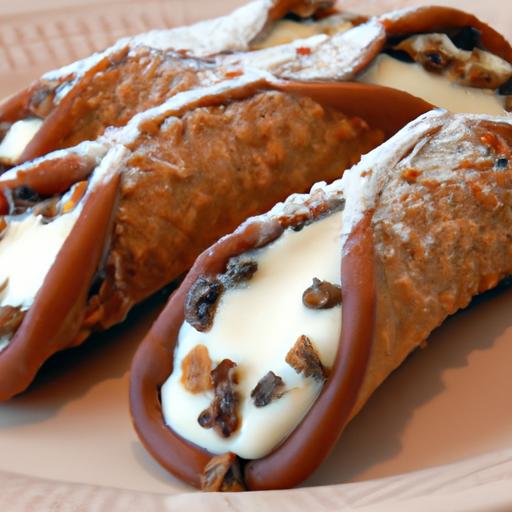
There’s a certain magic in the crispy, golden shells of a perfectly crafted cannoli, filled to bursting with sweet, creamy ricotta-a timeless treat that carries centuries of Italian tradition in every bite. Originating from the sun-drenched island of Sicily, the cannoli is more than just a dessert; it’s a story of heritage, craftsmanship, and indulgence wrapped in delicate pastry. In this article, we’ll journey through the art of crafting classic homemade cannoli, unveiling the secrets to creating this iconic Italian delight from scratch. Whether you’re a seasoned baker or a curious foodie, prepare to bring a touch of la dolce vita into your kitchen with a recipe that’s as authentic as it is indeed irresistible.
Crafting Classic Homemade Cannoli: A Sweet Italian Delight
Crafting classic homemade cannoli: a sweet italian delight is an irresistible journey into the heart of Sicilian tradition. This iconic dessert, with its crisp shell and luscious ricotta filling, carries centuries of heritage and flavor. Whether you’re celebrating a special occasion or craving an authentic taste of Italy, mastering the art of cannoli offers both joy and indulgence. From choosing the freshest ingredients to achieving that perfect crunch, this guide unlocks everything you need for an unforgettable cannoli experience.
Prep and Cook Time
- preparation Time: 30 minutes
- Chilling Time: 1 hour (for dough resting and filling)
- Cooking Time: 15 minutes (frying)
- Total Time: Approximately 1 hour 45 minutes
Yield
Makes approximately 12 classic cannoli (servings)
Difficulty Level
Intermediate – Requires attention to dough texture and frying technique, but approachable with careful steps.
Ingredients
- Cannoli Shells:
- 2 cups all-purpose flour, sifted
- 2 tbsp granulated sugar
- 1/2 tsp kosher salt
- 3 tbsp unsalted butter, cold and cubed
- 1 large egg, lightly beaten
- 1/2 cup dry white sparkling water (chilled)
- Vegetable oil, for frying (about 4 cups)
- Ricotta Filling:
- 2 cups whole-milk ricotta, well-drained
- 3/4 cup powdered sugar, sifted
- 1 tsp pure vanilla extract
- 1/4 cup mini chocolate chips (optional)
- 1 tbsp orange zest, finely grated
- Garnishes:
- Chopped pistachios
- Powdered sugar, for dusting
- Dark chocolate drizzle (melted)
Selecting the Perfect Ingredients for Authentic Cannoli filling
Using fresh, whole-milk ricotta is essential for the velvety texture and subtly sweet taste of your cannoli filling. always allow ricotta to drain overnight in a fine mesh strainer lined with cheesecloth; excess moisture will otherwise make the filling runny. Sweeten the filling with powdered sugar for a smooth dissolve, complemented perfectly by bright orange zest-this citrus note cuts through the richness and adds depth. For an authentic touch, miniature chocolate chips lend delightful bursts of flavor without overpowering the filling.Avoid substitutions like low-fat ricotta since they lack the creamy consistency crucial for an indulgent cannoli experience.
Mastering the Art of Crispy Shells with Customary Techniques
Perfect cannoli begin with a dough that balances tenderness and elasticity. A combination of cold butter and sparkling water creates a light, flaky shell that crisps wonderfully when fried. Roll the dough thin-aiming for just under 1/8 inch-because thicker shells fail to crisp properly, while too thin can cause excessive breakage. fry in hot vegetable oil (maintained between 350°F and 375°F) until golden brown, roughly 2-3 minutes, turning once. Avoid overcrowding the pan to maintain oil temperature and ensure even cooking. After frying, drain on paper towels and gently slide off the metal tubes while still warm to keep their hollow, tubular shape.
Filling and Garnishing Tips to Elevate Your Cannoli Experience
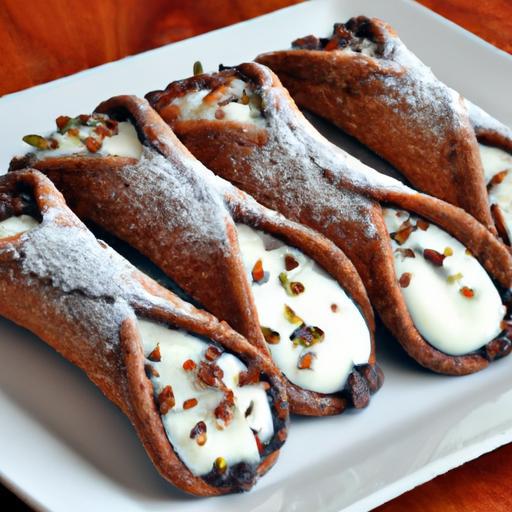
Fill cannoli shells just before serving to retain crunch-overfilling or preparing too far in advance invites sogginess. Use a pastry bag fitted with a wide tip for beautiful, clean filling application.Don’t hesitate to experiment with garnishes such as finely chopped pistachios for a buttery crunch, or a drizzle of smooth dark chocolate for a luxurious finish. A light dusting of powdered sugar visually elevates each piece, creating that signature Italian pastry look. Rendering contrasting textures-from creamy filling to crisp shells and crunchy nuts-guarantees an impeccable eating experience.
Storing and Serving Suggestions to Preserve Freshness and Flavor
Because the shell quickly softens after filling, store cannoli shells separately in an airtight container at room temperature for up to 2 days. Keep the ricotta filling covered in the fridge for up to 24 hours. assemble just before serving. For an added touch, serve on a rustic wooden board or atop a bed of vibrant mint leaves to emphasize freshness. Pair with espresso or an Italian-style coffee for a perfect balance of flavors. Leftover filling can be piped over fresh fruit or used as a decadent topping for cakes.
Instructions
- Prepare the Dough: In a large bowl, combine sifted flour, sugar, and salt. Cut in the cold butter using a pastry blender or fingertips until mixture resembles coarse crumbs.
- Add the beaten egg and gradually mix in chilled sparkling water until a stiff dough forms-avoid overworking. wrap in plastic and refrigerate for at least 1 hour.
- Roll and Cut Shells: Lightly flour a clean surface; roll dough thin, approximately 1/16 to 1/8 inch thick. Using a 4-inch round cutter, cut out circles.
- Form Shells: wrap each circle around a metal cannoli tube, sealing edges with a dab of beaten egg.
- Heat Oil and Fry: Heat vegetable oil in a deep skillet or pot to 350°F. Fry shells in batches, turning once, until golden and crispy (about 2-3 minutes). Drain on paper towels and carefully remove tubes while warm.
- prepare Filling: In a bowl, stir together drained ricotta, powdered sugar, orange zest, vanilla, and chocolate chips until smooth and fluffy.
- Assemble: Fill a piping bag with filling and gently pipe into each shell from both ends to evenly fill the center.
- Garnish & serve: Dip ends of stuffed cannoli in chopped pistachios or drizzle with melted dark chocolate. Dust lightly with powdered sugar before serving.
Chef’s Notes
- Drain ricotta thoroughly: Excess moisture ruins the filling texture. Line ricotta with cheesecloth overnight for best results.
- Oil temperature control: Keep oil consistent; too hot burns shells, too cool results in sogginess.
- Freeze metal tubes: Chilling tubes before frying helps maintain shape during cooking.
- Variation: Add a pinch of cinnamon or ground cloves to the filling for warm spice depth.
- gluten-Free Option: Substitute with a gluten-free flour blend but expect a slightly diffrent texture.
- Make-Ahead: Prepare shells a day prior; filling should be made no earlier than 24 hours ahead to preserve freshness.
Serving Suggestions
Present your cannoli on elegant dessert plates with a scattering of chopped pistachios and a dusting of powdered sugar. A ramekin of espresso or a tall café latte pairs nicely to cleanse the palate.For visual drama, drizzle a zigzag of dark chocolate around the plate or pipe a thin line of filling into hollow tart shells, offering a modern twist on this classic Italian delight.
| Nutritional information | Per Cannolo |
|---|---|
| Calories | 290 kcal |
| Protein | 6 g |
| Carbohydrates | 32 g |
| Fat | 14 g |

For more italian dessert inspiration, check out our classic tiramisu recipe. To explore the history and traditions behind Sicilian pastries, visit Sicily.co.uk.
Q&A
Q&A: Crafting Classic Homemade Cannoli – A Sweet Italian Delight
Q1: What makes cannoli a quintessential Italian dessert?
A1: Cannoli embody the magic of Sicilian pastry tradition-a crispy, golden tube encasing a luscious, creamy ricotta filling. This harmonious blend of textures and flavors creates a bite-sized party of Italy’s rich culinary heritage, making cannoli not just a dessert, but a cultural icon.
Q2: What are the key ingredients needed to make authentic cannoli shells?
A2: The classic cannoli shells come to life from simple pantry staples: all-purpose flour,sugar,a pinch of salt,a splash of white vinegar or white wine vinegar (for crispness),cold butter or shortening,and a touch of milk. The dough is rolled thin and shaped around metal tubes before frying to achieve that signature crunch.
Q3: How do you achieve the perfect crispy cannoli shell without overcooking?
A3: Perfect shells require hot oil-about 350°F (175°C)-and patience. Fry just until they’re golden brown, usually 2 to 3 minutes, turning gently to cook evenly. overcooking can make them too dark and bitter, while undercooking leaves them pale and soggy. Patience and precise temperature control are key.
Q4: what traditional filling is used in authentic cannoli?
A4: The heart of a cannolo is its filling-creamy, slightly sweet ricotta cheese, frequently enough mixed with powdered sugar, a hint of vanilla, and sometimes a sprinkle of cinnamon or finely grated citrus zest. This luscious mixture contrasts beautifully with the crunchy shell.
Q5: Can you customize the cannoli filling without losing its classic essence?
A5: Absolutely! While ricotta is king, adding small bursts of flavor-such as candied orange peel, mini chocolate chips, or chopped pistachios-can enhance the experience while honoring tradition. Just keep the texture creamy and the sweetness balanced.
Q6: What is the best method to avoid soggy cannoli shells when filling?
A6: To maintain crunch, fill the shells just before serving. Also, straining the ricotta thoroughly to remove excess moisture and chilling the filling helps prevent sogginess. If you must prepare ahead, store shells and filling separately until the last moment.
Q7: Are there any tips for shaping the cannoli shells perfectly?
A7: Use metal cannoli tubes for even shape and sturdy support during frying. Wrap the dough snugly around the tube, sealing the edges with a little water or egg white. Avoid rolling the dough too thin; about 1/8 inch thickness works best for crunch without fragility.
Q8: What are some traditional garnishes for cannoli?
A8: Classic garnishes include a dusting of powdered sugar, a sprinkle of chopped pistachios on the ends, or a few mini chocolate chips embedded in the filling. Maraschino cherries or candied citrus peel add that charming pop of color and a touch of extra sweetness.
Q9: How can homemade cannoli bring a bit of Italy to your kitchen table?
A9: Making cannoli from scratch invites you into the heart of Sicilian culture-where family, tradition, and love come together in every crunch and creamy bite. It’s more than dessert; it’s a delightful ritual that connects you to centuries-old roots, right in your own kitchen.
Q10: Is making cannoli at home difficult for beginners?
A10: While cannoli involve a few steps-making dough, frying, and preparing the filling-none are out of reach for adventurous bakers. With some practice and patience, the process becomes a rewarding, appetizing journey. Plus, homemade cannoli offer a sense of pride and authenticity unmatched by store-bought versions.
Final Thoughts
As you wrap up your journey into the art of crafting classic homemade cannoli, you’ve not only mastered a recipe but also embraced a timeless Italian tradition. Thes crispy shells filled with luscious, sweetened ricotta offer more than just flavor-they deliver a slice of Sicily’s rich heritage with every bite. Whether shared at a festive gathering or savored in quiet moments, homemade cannoli invite you to connect with a culture of indulgence and warmth. So, dust off that apron, gather your ingredients, and let your kitchen become a little trattoria where sweet memories are made one cannolo at a time. Buon appetito!