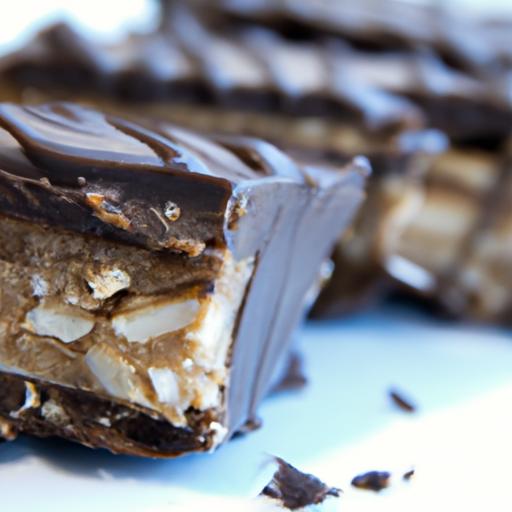
When it comes to indulgent treats that satisfy both the sweet tooth and the craving for a rich, nutty flavor, few desserts hit the mark quite like chocolate peanut butter bars. But what if you could skip the oven and still dive into a luscious, melt-in-your-mouth experiance? Enter the Decadent Chocolate Peanut Butter No-Bake Bars-a heavenly fusion of silky chocolate and creamy peanut butter, combined in a quick and easy recipe that promises maximum flavor with minimal effort. Whether you’re a seasoned baker looking for a speedy fix or a novice eager to impress, this guide will walk you through every step to create these irresistible bars that are perfect for any occasion. Get ready to treat yourself to a luscious dessert that’s as simple to make as it is delicious to devour!
Decadent Flavor Fusion: the Perfect Balance of Chocolate and Peanut Butter
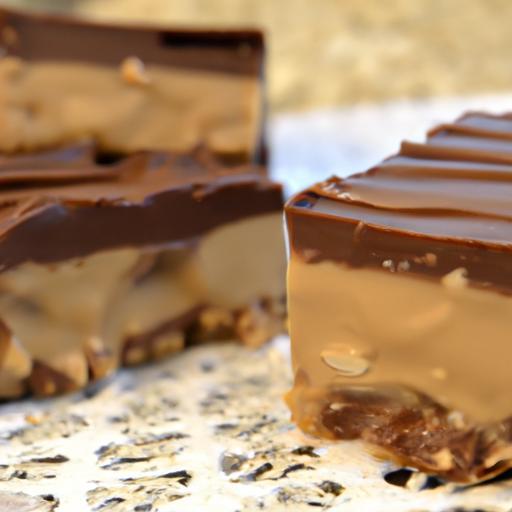
Decadent Chocolate Peanut butter No-Bake Bars Recipe Guide invites you to indulge in a luscious world where creamy peanut butter meets rich chocolate in harmony.This timeless combination has its roots in classic Americana desserts but has evolved into a versatile treat beloved for its ease and depth of flavor. The no-bake approach delivers a velvety texture that melts in your mouth, perfect for weekend gatherings or a quick yet indulgent snack.
Prep and Cook Time
- Readiness: 15 minutes
- Chilling: 2 hours
- Total time: 2 hours 15 minutes
Yield
Makes approximately 16 bars, perfect for sharing or savoring throughout the week.
Difficulty Level
Easy: No baking skills required, ideal for beginners and seasoned home cooks alike.
Essential ingredients for Rich No Bake Bars
- 1 1/2 cups creamy peanut butter (natural or classic, unsweetened preferred)
- 1/2 cup unsalted butter, softened
- 2 cups powdered sugar, sifted
- 2 cups graham cracker crumbs (finely crushed)
- 1 1/2 cups semi-sweet chocolate chips
- 1 tablespoon coconut oil or vegetable oil
- 1 teaspoon pure vanilla extract
- Optional: A pinch of sea salt for topping or swirling in bars
Step by Step Guide to Achieve the Creamiest Texture
- Prepare your pan: Line an 8×8-inch square baking pan with parchment paper, leaving edges overhanging for easy removal.
- Combine the base: in a large bowl, whisk together the creamy peanut butter, softened butter, and vanilla extract until smooth and silky. Use a hand or stand mixer at medium speed for about 2 minutes.
- add sweetness and structure: Gradually blend in the powdered sugar and graham cracker crumbs into the peanut butter mixture. Stir gently using a spatula until a thick, pliable dough forms.
- Press and chill: Transfer the peanut butter crust to the prepared pan.Press it firmly and evenly into the base using the back of a spoon or your fingers for a compact layer. Refrigerate for 30 minutes to set.
- Melt the chocolate layer: In a microwave-safe bowl, combine the semi-sweet chocolate chips and coconut oil. Microwave in 30-second bursts, stirring in between, until smooth and glossy. Be cautious to avoid overheating which can cause seizing.
- Assemble the bars: Pour the melted chocolate gently over the chilled peanut butter base. Spread evenly with a spatula. Optionally, sprinkle a tiny pinch of sea salt on top or create swirls using leftover peanut butter for a gourmet touch.
- Final chill: Place the bars back into the refrigerator for at least 1 to 2 hours or until the chocolate is firm and bars are set.
- Slice and serve: use a sharp knife warmed in hot water to cut the bars into 16 even rectangles for clean edges.
Expert Tips for Customizing Your No Bake Bars
- Texture twist: Swap out graham cracker crumbs for crushed digestive biscuits or gluten-free cookie crumbs to tailor the base texture and flavor.
- Nut swap: Use almond butter or cashew butter for a unique nutty flavor while keeping the creamy foundation.
- Chocolate variations: For a deeper flavor, use dark chocolate chips (70% cocoa) or a blend of milk and dark chocolate for richness.
- Make it vegan: Replace butter with coconut oil and ensure your chocolate chips are dairy-free.
- storage advice: Keep the bars refrigerated in an airtight container for up to one week or freeze wrapped individually for extended enjoyment.
- Prevent sticking: Lightly grease your knife or dip it in hot water between each slice to maintain pristine edges.
Serving Suggestions
Present these decadent bars on a sleek dessert plate with a few whole peanuts scattered around for a rustic look.Garnish with a light dusting of cocoa powder or drizzle a little melted white chocolate on top for a beautiful contrast. Pair with a cold glass of milk or a creamy coffee latte for a perfect afternoon treat. For gatherings, serve alongside fresh berries or slices of ripe banana to add brightness and balance to the richness.

| Nutrient | Per serving (1 Bar) |
|---|---|
| Calories | 250 kcal |
| Protein | 6 g |
| Carbohydrates | 22 g |
| Fat | 16 g |
Enhance your baking repertoire with other no-bake delights like our No-bake Oreo Cheesecake for an equally indulgent but different flavor profile. For further nutritional insight on peanut butter and chocolate, explore the nutrition Value Database.
Q&A
Q&A: Decadent Chocolate Peanut Butter No-Bake Bars Recipe Guide
Q1: What makes these no-bake bars so decadent?
A1: The magic lies in the perfect harmony between rich, velvety chocolate and creamy, nutty peanut butter. When combined with a luscious, no-bake base that’s both chewy and satisfyingly dense, each bite feels like a melt-in-your-mouth indulgence-without the fuss of turning on the oven.
Q2: How quickly can I whip up these bars?
A2: Surprisingly fast! From start to finish, you’ll spend about 15 to 20 minutes mixing and layering ingredients, then just a couple of hours chilling in the fridge. That means a sweet, homemade treat ready by afternoon or evening-perfect for last-minute cravings or unexpected guests.
Q3: Can I substitute the peanut butter for another nut or seed butter?
A3: Absolutely! while classic peanut butter gives that iconic flavor,creamy almond butter,cashew butter,or even sunflower seed butter work beautifully.Just pick a smooth variety for the best texture and spreadability. Keep in mind, changing the nut butter will gently shift the flavor profile, adding your own twist to the decadence.
Q4: Are there any tips for getting perfectly shaped bars?
A4: yes! Line your pan with parchment paper, leaving a bit hanging over the edges. After pressing the mixture evenly into the pan and chilling, use the parchment “handles” to lift the bars out easily. Use a sharp knife warmed slightly with hot water to slice clean, handsome squares without crumbling.
Q5: How can I store these bars to keep them fresh and delicious?
A5: Store them in an airtight container in the refrigerator,where they’ll stay fresh and firm for up to a week. If you love a firmer bite, keep them cold; for a softer, more gooey texture, let bars come to room temperature for 10 minutes before enjoying.
Q6: Is this recipe suitable for beginners or those with limited kitchen experience?
A6: definitely! Because the recipe doesn’t require baking or complicated techniques, it’s pleasant for cooks at every level. The straightforward mixing and layering steps feel inviting-plus, the quick chill time means you see (and taste!) results almost instantly.
Q7: Can I add extras for texture, like nuts or chocolate chips?
A7: Without a doubt! Chopped roasted peanuts, crunchy cacao nibs, or mini chocolate chips add delightful bursts of texture and surprise within each bar. Just fold them gently into your base or sprinkle on top before chilling for an extra layer of decadence and crunch.
Q8: How do these bars accommodate dietary preferences or restrictions?
A8: These no-bake bars are versatile! For gluten-free options, use certified gluten-free oats or substitutes like puffed quinoa. Opt for natural peanut butter with no added sugar or oils to keep things wholesome. Vegan lovers can select dairy-free chocolate and check peanut butter labels to ensure no animal-derived ingredients are included.
Q9: What’s the secret to achieving that glossy, smooth chocolate layer on top?
A9: The secret is gently melting the chocolate-using either a double boiler or low heat in short bursts in the microwave-to avoid burning or seizing. Stir frequently until silky smooth, then pour evenly over the peanut butter base. Chilling it undisturbed gives that glossy, professional touch.
Q10: Can these bars be frozen for longer storage?
A10: Absolutely! Wrap individual squares in parchment or plastic wrap and place them in a freezer-safe container. Frozen bars taste amazing after thawing for 10-15 minutes and keep well for up to 2 months. Perfect for prepping batches ahead or saving some indulgence for later.
Enjoy crafting your next decadent chocolate peanut butter masterpiece-no oven required!
Closing Remarks
And there you have it-a luscious journey into the world of decadent chocolate peanut butter no-bake bars that promise indulgence without the fuss. Whether you’re craving a quick treat or planning to impress friends with minimal effort, this recipe guide equips you with the perfect blend of rich flavors and effortless preparation. So next time the sweet tooth strikes, skip the oven and embrace these no-bake delights-because sometimes, the simplest recipes create the most unforgettable moments. Happy snacking!