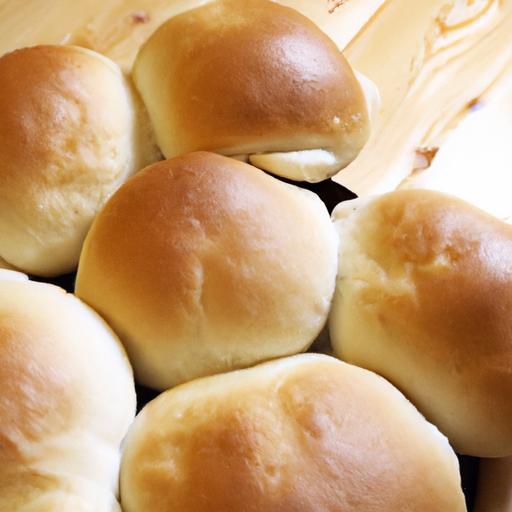
There’s something undeniably magical about the aroma of freshly baked dinner rolls wafting through your home-a warm, inviting promise of comfort and satisfaction. But achieving that perfect balance of fluffy softness and golden crust can feel like a baking mystery reserved for experts. Fear not! With the right techniques and a little bit of love, you can create homemade dinner rolls that rise beautifully, bake evenly, and taste like thay came straight from a bakery. In this article, we’ll guide you through the secrets too making fluffy and easy homemade dinner rolls that turn out perfect every single time-because everyone deserves a little homemade magic on their dinner table.
Choosing the Right Ingredients for Soft and Tender Rolls
Fluffy & Easy Homemade Dinner Rolls owe their irresistibly soft, tender crumb and delicate texture to the careful selection of each ingredient. The foundation begins with all-purpose flour,which provides the perfect balance of gluten to create a soft yet structured roll that rises beautifully.Incorporating a bit of bread flour can enhance chewiness, but for most home bakers, sticking with all-purpose flour ensures ease and consistency.
Choosing the right fat is equally meaningful-unsalted butter imparts a rich, creamy flavor while coaxing out a tender crumb. For those seeking a slightly lighter finish, substituting part of the butter with a neutral oil like canola or vegetable oil works wonderfully. whole milk enriches the dough by adding moisture and enhancing softness, while also contributing to the rolls’ golden hue during baking.Don’t underestimate the power of egg in this equation; it adds structure, color, and moisture to each roll.
Lastly, active dry yeast is the magic agent that transforms this dough from simple ingredients into fluffy wonders.Opt for fresh, properly stored yeast to guarantee reliable rising. A touch of sugar feeds the yeast and enhances browning, while salt rounds out flavor and controls fermentation. By combining these key ingredients thoughtfully, you set the stage for consistently superior dinner rolls.
Step-by-Step Kneading and Proofing Techniques for Consistent results
Mastering the kneading and proofing phases is essential for consistently fluffy & easy homemade dinner rolls. Begin by mixing the wet and dry ingredients until a shaggy dough forms. Turn it onto a lightly floured surface and knead for approximately 8-10 minutes until the dough becomes smooth and elastic. This process develops the gluten network-think of it as a delicate web that traps air bubbles during rising, ensuring that cloud-like lift.
If a stand mixer is your tool of choice,using the dough hook on medium speed for about 6-7 minutes achieves the same result. A well-kneaded dough will bounce back when poked gently and feel soft but not sticky.
Next comes the first proofing-cover your dough with a clean kitchen towel or plastic wrap and place it in a warm, draft-free spot. ideal proofing temperatures range between 75°F and 85°F. Within 1 to 1.5 hours, the dough should double in size, with visible puffiness and lightness.
Once risen, gently deflate the dough to release large bubbles, then divide and shape into rolls. Allow the rolls to undergo a second proofing on the baking sheet until they nearly double again, usually about 30-40 minutes. This two-stage fermentation reinforces structure and flavor, ensuring every bite melts in your mouth.
Tips for Baking Perfectly Golden Rolls with a Buttery Finish
achieving that picturesque golden exterior with a rich buttery finish requires a few expert touches. Before baking, brush each roll delicately with melted butter or an egg wash mixed with a splash of water or milk. This not only intensifies browning but adds layers of flavor and sheen.
ovens vary, but a 350°F temperature is generally ideal to bake these rolls evenly without drying out their tender crumb. Baking too hot can cause rapid browning and a doughy center,while too low fails to crisp the crust. Check your rolls after 15 minutes-perfectly baked dinner rolls will be golden-brown on top and sound hollow when tapped at the bottom.
Immediately after removing from the oven, apply another brush of warm melted butter. This final step envelopes the rolls in a sumptuous, fragrant coating and prolongs softness.
For an added sensory delight, sprinkle flaky sea salt or chopped fresh herbs like rosemary or thyme just before baking or right after buttering for rustic charm and extra aroma.

Prep and Cook Time
- Readiness: 20 minutes
- First Proofing: 1 to 1.5 hours
- Second Proofing: 30 to 40 minutes
- Baking: 15 to 18 minutes
- Total Time: Approximately 2.5 hours
yield
Makes 12 dinner rolls-perfect for family dinners, gatherings, or meal prepping.
Difficulty Level
Easy to Medium: Ideal for beginner bakers willing to learn essential bread-making techniques with confidence.
Ingredients
- 3 ½ cups all-purpose flour, sifted
- 2 ¼ tsp active dry yeast (one packet)
- 1 cup whole milk, warmed to 110°F
- ¼ cup granulated sugar
- 4 tbsp unsalted butter, melted plus extra for brushing
- 1 large egg, at room temperature
- 1 tsp salt
- Optional: flaky sea salt or fresh herbs for garnish
Instructions
- Activate the yeast: In a small bowl, combine warm milk and sugar. Sprinkle yeast over the surface and let stand for 5-10 minutes until foamy.
- Mix wet ingredients: In a large mixing bowl, whisk together melted butter and egg. Add the activated yeast mixture and stir to combine.
- Combine dry ingredients: in another bowl, mix flour and salt. Gradually add the flour mixture to the wet ingredients, stirring with a wooden spoon or dough hook attachment.
- Knead the dough: Turn dough onto a lightly floured surface and knead for 8-10 minutes until smooth and elastic. Alternatively,knead with a stand mixer on medium speed for 6-7 minutes.
- First proof: Place the dough in a lightly oiled bowl and cover with a damp towel or plastic wrap. Let rise in a warm area until doubled in size, about 1 to 1.5 hours.
- Shape rolls: Punch down dough gently to release bubbles. Divide into 12 equal pieces and shape into smooth balls. Place rolls on a greased baking sheet, spaced slightly apart.
- Second proof: Cover again and let rise until nearly doubled, about 30-40 minutes.
- Preheat oven: Heat oven to 350°F (175°C).
- Brush and bake: Brush rolls with melted butter. Bake for 15-18 minutes, or until golden brown and hollow-sounding when tapped beneath.
- Finish with butter: Remove from oven and immediately brush with more warm melted butter. Let cool slightly before serving.
Tips for Success
- Flour consistency: Flour amounts vary by humidity and brand. add gradually to reach a dough that’s tacky but not sticky.
- Milk temperature: Use warm milk (~110°F) to activate yeast effectively, but not so hot that it kills yeast cells.
- Proofing spots: If your kitchen is cool, proof dough inside an oven with just the light on or near a warm appliance.
- Make ahead: After shaping, refrigerate rolls overnight. Before baking, allow to come to room temperature and complete the second proof.
- Variations: add garlic powder or herb mix to the dough for savory rolls or sweet cinnamon sugar for a breakfast twist.
Serving Suggestions
Serve your fluffy & easy homemade dinner rolls warm, brushed with extra melted butter. pair beautifully with hearty soups, fresh salads, or roasted vegetables. For special occasions, garnish with a sprinkle of flaky sea salt, minced fresh herbs like rosemary, or a drizzle of honey butter for a sweet-savory contrast. These rolls also make fantastic sliders, stuffed with your favorite fillings for approachable party bites.
| Nutrient | Per Roll (approx.) |
|---|---|
| Calories | 140 kcal |
| Protein | 4 g |
| Carbohydrates | 20 g |
| Fat | 5 g |
For more on mastering basic bread baking techniques, check out our detailed Easy Bread Baking Guide. To understand the chemical magic behind yeast and gluten, this insightful article from King Arthur Baking is a must-read.
Q&A
Q&A: Fluffy & Easy Homemade Dinner Rolls: Perfect Every Time!
Q1: What makes these homemade dinner rolls so fluffy and soft?
A1: The secret to irresistibly fluffy dinner rolls lies in the combination of warm milk, a touch of sugar to feed the yeast, and proper kneading to develop gluten. The dough’s hydration level and a good rise time allow the rolls to be light, airy, and melt-in-your-mouth soft. Using melted butter both in the dough and brushed on top also adds richness and tenderness.
Q2: Can I make these rolls without any fancy equipment?
A2: Absolutely! These dinner rolls are designed to be simple and approachable. You only need basic kitchen tools like a mixing bowl, a wooden spoon or spatula, and a baking sheet.Kneading by hand is perfectly fine, and you can also speed up the process by using a stand mixer if you have one, but it’s not essential.Q3: How long should I let the dough rise for the best results?
A3: Patience is key! For perfectly fluffy rolls, allow the dough to rise until it doubles in size, usually about 1 to 1.5 hours in a warm, draft-free spot. After shaping the rolls, a second rise of 30 to 45 minutes helps develop softness and gives them that perfect puff before baking.
Q4: Can I make the dough ahead of time?
A4: Yes! For convenience, you can prepare the dough the night before and let it rise slowly in the refrigerator. This slow fermentation adds more flavor complexity. Just remember to bring the dough back to room temperature before shaping and the final rise.
Q5: Are these dinner rolls suitable for freezing?
A5: Definitely! Bake your rolls, let them cool completely, then freeze them in an airtight container or freezer bag. When you want fresh rolls, just thaw at room temperature and warm them in the oven for a few minutes-they’ll taste like they just came out of the oven.
Q6: Can I add herbs or other flavors to the dough?
A6: Yes, customization is part of the fun! Try adding dried herbs like rosemary, thyme, or a sprinkle of garlic powder to the dough for an aromatic twist. You can also brush the tops with garlic butter or sprinkle coarse sea salt for savory variation.
Q7: What’s the best way to serve these rolls?
A7: These fluffy dinner rolls are incredibly versatile! Serve them warm with a pat of butter, alongside hearty soups, stews, or your favorite vegetable mains.They also make amazing sliders or small sandwich buns with fresh ingredients.
Q8: How do I know when the rolls are perfectly baked?
A8: The rolls should be golden brown on top and sound hollow when tapped on the bottom. An internal temperature of around 190°F (88°C) confirms they’re fully cooked. Overbaking can dry them out, so keep a close eye near the end of baking.
Q9: Can I substitute whole wheat flour in this recipe?
A9: You can! For a healthier twist, swap half of the all-purpose flour with whole wheat flour. Keep in mind, whole wheat dough tends to be denser, so you might need a little extra liquid to keep the rolls soft and tender.
Q10: What’s the best way to store leftover dinner rolls?
A10: Store any leftovers in an airtight container or zip-top bag at room temperature for up to two days. To maintain softness, you can reheat them briefly wrapped in foil in the oven. Avoid refrigerating leftovers, as that tends to dry them out faster.
To Wrap It Up
There you have it-fluffy, golden dinner rolls that rise to the occasion every single time. with a few simple ingredients and a bit of patience,you can bring the warmth of homemade goodness straight to your table.Whether you’re pairing them with a hearty stew,sipping soup,or simply enjoying them with butter and jam,these rolls are sure to become your new kitchen staple. So roll up your sleeves, embrace the joy of baking, and watch as these soft, irresistible delights transform your mealtime into something truly special. Happy baking!